Hello there! I have a DIY holiday post for you today. I know, I know... I'm breaking some rules and giving you a Christmas post before Thanksgiving, but hey, I'm not ashamed. I typically will wait for the day AFTER Thanksgiving to decorate for Christmas, but this year is a little different with a new baby coming.
Last year I did a DIY Christmas tree craft as well using a Dollar Tree ornament and book pages. It turned out to be pretty cute and wasn't rocket science, just a little time consuming. This DIY is along those same lines. I also butchered an old fitted plaid flannel sheet last year to create some more decor pieces -- a table runner and some garland. For this Christmas season's decor I wanted to go along with the easy and plaid theme.
So, once I had the idea of what I wanted to do for my craft I knew I needed to come up with an affordable option for my seasonal decor. Sheets aren't cheap. And fabric can be costly. Then one day it dawned on me. Thrifting. I figured I could find a few plaid/flannel options in the men's clothing section at Goodwill. And I did! Ready for the super easy tutorial?
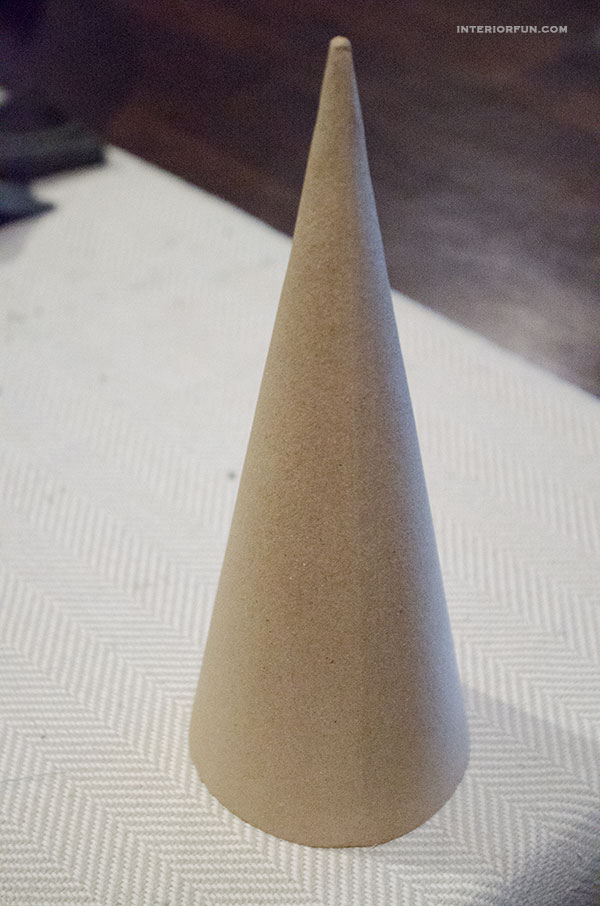
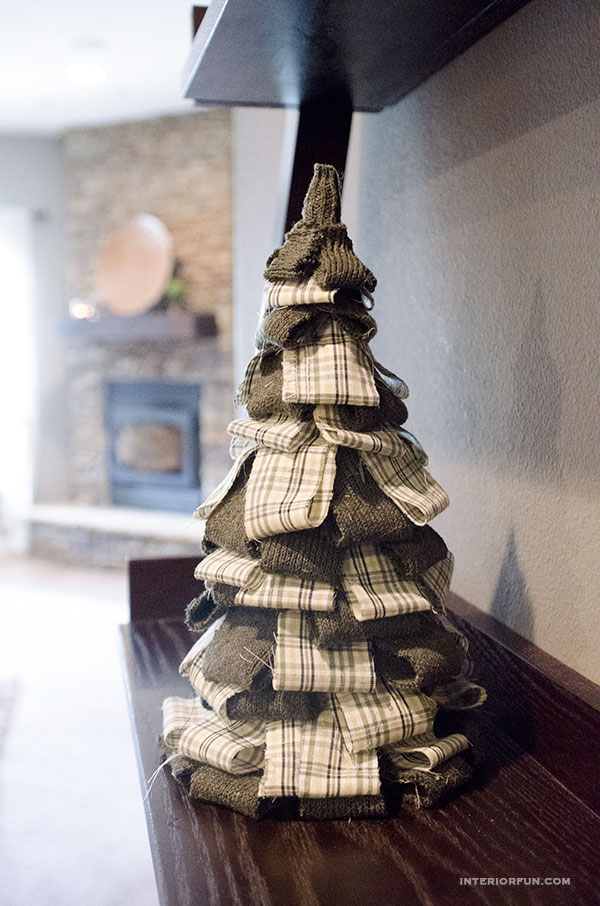
Materials you will need: 2 Types of Fabric, Scissors, Hot Glue Gun (and glue), Paper Mache Cone
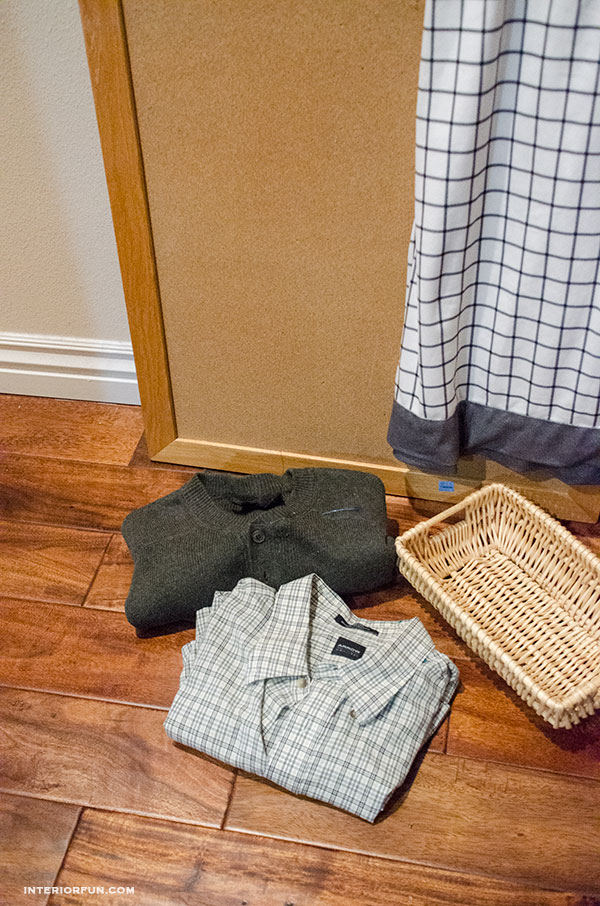
First off, my Goodwill goodies. A huge bulletin board for the "school" in our playroom. Only $1. A basket for remotes, a super soft flat sheet (not sure what the plan is for this yet), and two men's shirts. One is a plaid cotton short sleeve and the other is a long sleeve green sweater. I thought the variation in fabric would make the tree a bit more interesting with different textures.
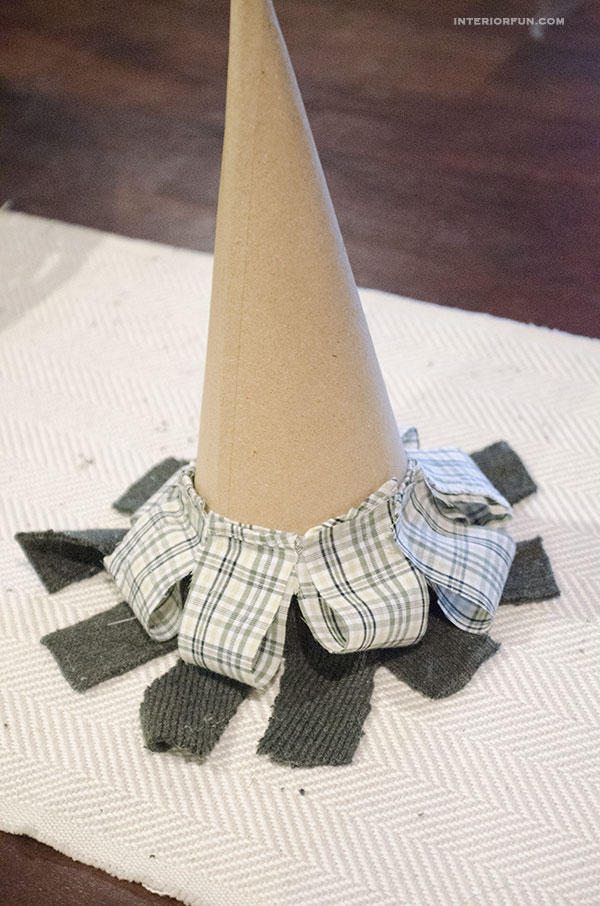
I cut strips out of the plaid shirt (I'd say about 2-3 inches long). I only used one front panel if you can picture that. So, I still have the other side, back and sleeves to do future projects with.

I also cut similar length strips of the sweater, although much less than the plaid shirt. I only used one sleeve of the sweater.

As for the base of the Christmas Tree, I used a paper mache cone from Michael's craft store. I already had this on hand from last year.
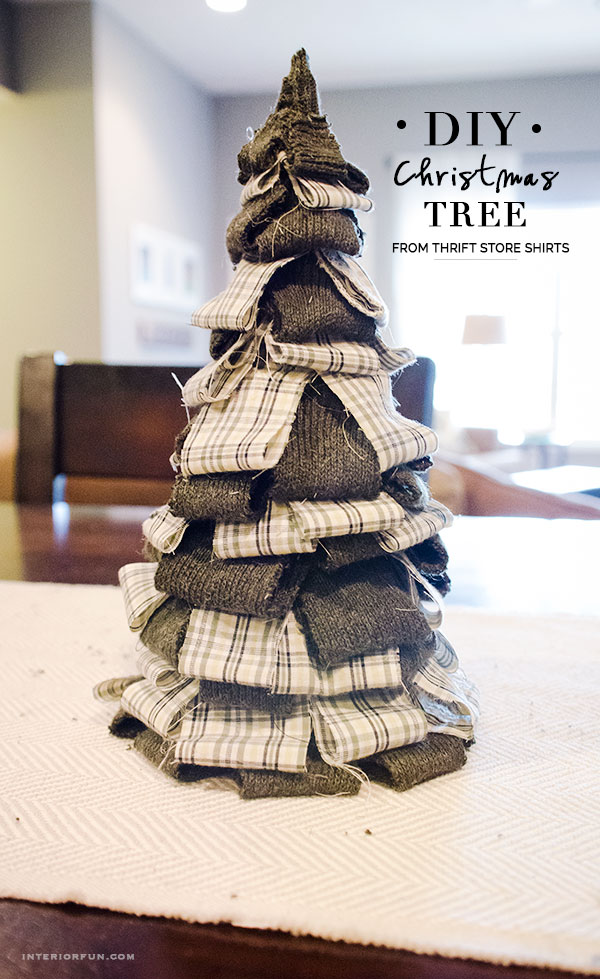
I started with one solid row of green sweater material and hot glued them all along the bottom edge, about a half inch above the very bottom. Next I started on a row of the plaid shirt.

I realized that I wanted some more depth and interest, so I used more hot glue to fold the strips into loops.
I continued to glue the pieces to the cone, but starting varying which fabrics I was using as I worked around the cone rather than having one row of each fabric. More variety = more interesting. :)
I finished it off with the green sweater, because I thought it looked more Christmas tree like with the green and all. I wrapped a small piece around the very top point, using more glue to secure it. I might add a bow or some other topper later, but for now I think it's darling!
It's a little shabby -- a little country -- and a lot charming! Stay tuned for what happens with the rest of the fabric from my thrift store shirts. Anyone else doing early Christmas decorating? Fess up, I need to let my husband know that I'm not the only one and it's OK to do this! :)
No comments:
Post a Comment