It can be very exciting to learn how to propagate succulents, not to mention that it is also cost-effective because it saves you from the need to buy new plants. Rather than simply buying more succulents from your favorite nursery, all you have to do to propagate succulents is to take division or cuttings from your existing plants or use seeds.

Succulent propagation is also a great way to have a fun gardening experience even for people who weren’t blessed with a green thumb. You just need to follow some simple steps and you will be good to go.
Different Ways to Propagate Succulents
You can propagate succulents using one out of the three methods, two of which are asexual, namely cuttings and division, resulting in the original plant’s exact clones. Starting new plants using seeds is the third technique, which is a sexual reproduction method resulting in new plants with a somewhat genetic makeup compared to that of the parent, making them unidentical.
Propagate Succulents from Cuttings
One of the most popular methods to start new plants is to take either stem or leaf cuttings, especially in many commercial greenhouses or nurseries. This method lets you grow an abundant number of new plants from just one mature succulent.
As long as it is done properly, the cutting method has a high rate of success, resulting in new plants that are identical clones of the parent plant.
- Stem cuttings can grow best for succulents with branches. The method is useful if plants turn leggy because of a lack of sun. You can remove the rosette or spindly branch and repot it.
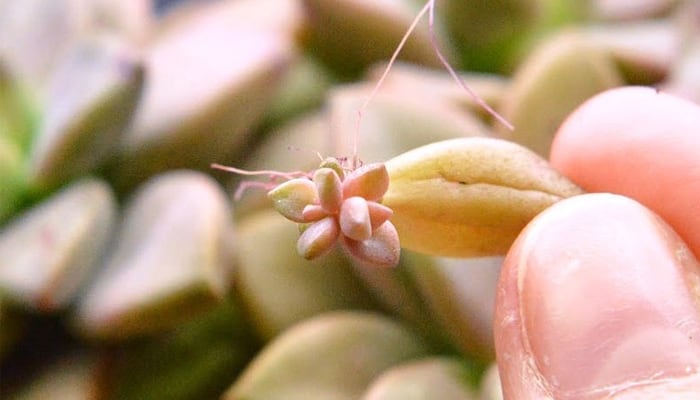
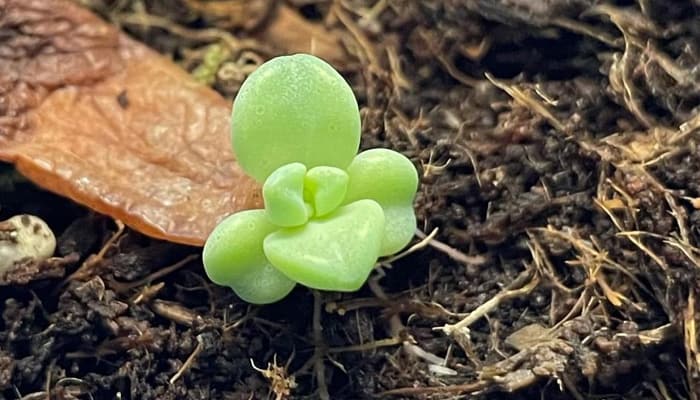
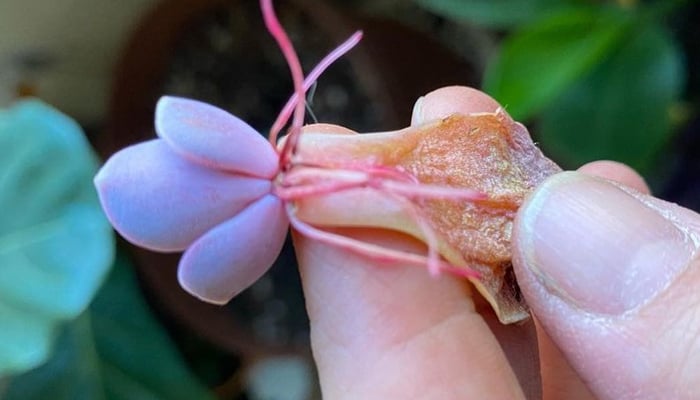
- Leaf cuttings are ideal for plants that have big fleshy leaves such as jade or echeveria. Similar to other types of herbaceous plants, you just need to remove one leaf from the parent plant and let it root and grow to become a full-sized plant.

Propagate Succulents by Division
Propagating your succulents by division happens if you take a plant and then gently divide or break it apart into several smaller plants. You will then plant these divisions in their individual pots. These divisions will then grow over time into full-sized specimens.
You can divide plants using two different ways, which include removing the tiny pups produced by the plant and splitting up the root ball.
- As certain succulents grow, small daughters or pups grow around the parent plant’s base. Often called offshoots or offsets, you can separate these juvenile plants from the mother plant and repot them to grow a new succulent. This method is considered the easiest for the plant that can grow well for cacti, agave, sempervivum, haworthia, and echeveria.
- The entire plant will be removed from its container during root division, and it will be separated with extra care into smaller plants. The method works best for plants growing like grass with many stems. Peperomia, kalanchoe, sansevieria, sedum, and aloe are all ideal plants for this root division method.
Propagate Succulents from Seeds
You can also use seeds to propagate succulents. However, this method is considered the least common out of the three. This is often avoided since starting new succulents from seed often takes much longer compared to taking stem or leaf cuttings or dividing plants. Propagating from seeds can also lead to a genetic difference in the offspring whatever the succulent variety is.
Steps to Propagate Succulents from Cuttings
To successfully propagate succulents, first, you need to prepare the supplies for the task. These include the following:
- Mother plant
- Containers
- Shallow tray
- Growing media
- Cutting utensil
- Rooting hormone
- Spray bottle
The steps below involve the use of either stem or leaf cuttings to propagate new succulents because this is the most involved technique. Dividing plants is a very straightforward process, especially if you have repotted some of your houseplants before or split outdoor perennials. Since it is very rare to start succulents from seeds, there is not much need to discuss that method.
1. Take Cuttings
If you are using stem cuttings, disinfect a pair of scissors and use them to cut off a stem section with 3 to 4 nodes on it at about 4 inches long. Make a clean cut at the end, remove the leaves at the lower couple of inches, and proceed to step 4.
For leaf cuttings, take off an entire fleshy leaf. Grasp the leaf between your forefinger and thumb and either rock it back and forth or twist it gently until you separate it from the stem with a clean break. Proceed to step 2.
2. Form a Callus
This step is essential for successful propagation when using leaf cuttings. The leaves’ cut end must form a callus or dry out before planting to prevent rot.
- Put a potting mix, perlite, or sand on the shallow tray or lay some paper towels on the bottom.
- Dip the tips of the leaves into the rooting hormone and gently knock off any excess from the tissue.
- Place the leaves across the tray and leave enough gap between each to encourage air circulation.
- Put them somewhere dry and warm out of direct sunlight for 3 to 4 days.

3. Grow Roots
After the tips have a callus or thickened layer, you can directly plant these into containers or let them form roots in the trays.
- You can leave the callused tip on top of the medium or bury them slightly if you will let them stay in the tray.
- Mist the leaf cuttings using a spray bottle every few days to prevent them from drying out.
- Place the trays under indirect bright sunlight.
4. Planting
For your stem cuttings:
- Put slightly dampened potting soil in the containers near the top.
- Dig a hole in the center of the container using a spoon or your finger.
- Dip the stem’s cut tip into the rooting hormone and gently tap to get rid of any excess.
- Put the stem into the dug hole so that a minimum of two nodes will be under the soil surface.
- Secure the cutting by tamping the soil surrounding the stem.
After the roots form on your leaf cuttings, it is time to move them into bigger containers.
- Put slightly dampened potting soil in the containers near the top.
- Dig a shallow hole in the center of the container.
- Set the leaf gently into the hole and ensure that the tender roots don’t break off.
- Tamp the soil around the leaf’s base to secure the cutting and cover the roots.


